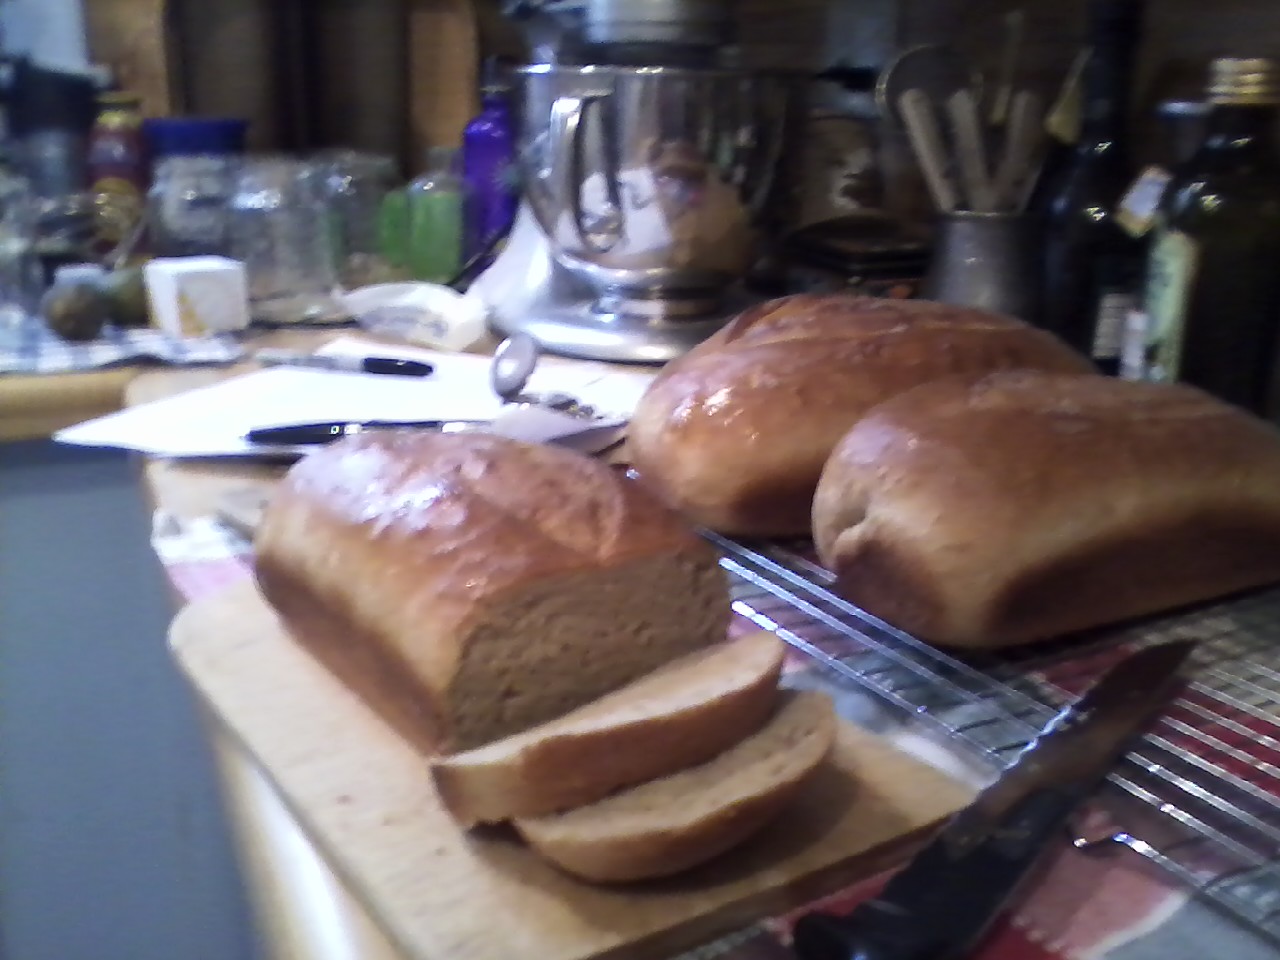
Robert’s French Bread

Basic French Bread Recipe

BaggettesThis is a basic “water dough,” meaning its main ingredients are flour, yeast and water.  This makes a great, crisp bread, but the absence of oil also means it may go stale more quickly. This can be formed into the traditional long skinny bagguettes, the shorter rounder boule,  thick long italian loafs, or small petite pain or brötchen.


Ingredients:

3 cups warm water
a pinch of sugar (optional, oh ye of little faith)
2 Tbsp. Yeast (maybe 3 envelopes?)
1Tbsp. Salt
7 cups, give or take, of bread flour (6+ cups); Yeah, yeah, I don’t have an exact amount because there isn’t an exact amount–I live in a very humid, even damp, part of the country, if you are actually dry, you will need less flour.
Possibly a bit of olive oil, corn meal and vinegar as tools for the preparation.

A note on flour: Although I am casual about what flour you use on other breads, I strongly recommend King Arthur Bread Flour. Imitating European bread requires a flour that imitates European flour. European flour comes from a specific type of hard red wheat which is easier to grow in New England because of the similar climate and latitude.

Step 1, Proofing: Put the first 2 cups of hot water in a large bowl (or the mixer bowl if you plan on letting the bread hook to do the heavy lifting). This can actually be hot, since it will warm the bowl, and since there are several things which will go on before it comes in contact with the yeast. In a 1 1/2 or 2 cup pyrex measruing cup or a mason jar, add one cup of warm water, a pinch of sugar (the yeast actually can get its sugar from the flour, so this isn’t necessary, but I have trust issues), and whisk until the sugar is disolved. Add the 2 Tbsp. of Yeast and whisk until smooth. Set aside.

Step 2, Adding flour: Return to the other bowl and whisk the salt into the 2 cups of water. Slowly sift–yes, sift–in the first 2 cups of flour–whisking in each 1/2 cup until it is smooth. By the time this batter–and the consistency will be like a batter–is starting to get stiff, the yeast mixture should have strted foaming up, and might be about to overflow. Add the yeast mixture to the flour mixture and whisk until smooth Sift in another cup or so of flour a little at a time, until the mixture is almost too thick for the whisk. At this point, take out the whisk and leave this in a warm place for 5 minutes and walk away. Fold laundry, have a glass of wine, play with the dog, try to figure out where you put the rest of the bread flour, dance, just leave the yeast alone.

Step 3, Kneading: Come back to Erin, Mavourneen, Mavourneen. If it is bigger, and a little poofy, the yeast is doing great. If not, either you have bad yeast or a cold spot. Continue to sift in the Bread Flour 1/4 of a cup at a time, and thoroughly mix it in; at this point, I would be using a big wooden spoon, when this is too hard, use a mixer with a bread hook or turn it our onto a floured surface.
It is important to knead the flour in 1/4 of a cup at a time, and after each bit of flour, hook or knead the bread until it becomes one thing again–not a mixture of flour and dough, but one unit. When the dough is a single round thing holding on to itself and not sticking to other things, behaving about like a deflated volley ball, it is ready. Until the sandwich laves, the doaugh should still be a little sticky, but it should be a ball that feels sticky, not doough that leaves the group , breaks apart, and sticks to your hands in large globs. The amount of the flour doesn’t matter–getting it to this proper consistency is what matters. Roll it around on the counter for good measure.

Step 4, Rising: Grease a smooth bowl 3 times as big as the dough. Roll the dough ball in the oil, and then cover with plastic wrap or a wet towel or something that will let it slip without drying out. Let this sit in in a warm place–in the oven with a heating pad on a different shelf, on the sunny side of the house, just a safe and warm place–until the dough has doubled in size. Usually, this will be about an hour.

Step 4, Second Rising:  Turn the dough out onto a clean surface, and punch it down (forcefully knead it), which should reduce it to close to its original size. Separate this into 3 portions ( or 4 or… you figure it out) and shape these into loaves; make sure that there are not seams or spots the loaf might separate, maybe pinching loose edges and rolling it about a bit–each should be smooth and coherent–it’s own little self.

Step 5, Second Rising: Prepare baking sheets for the loaves you have just formed. If the sheets have a good non-stick surface like my bagguette pans, just spray with a little bit of oil, or, on a baking sheet, you can spray a little bit of oil the size of each loaf and sprinkle a bit of corn meal. Put each loaf onto a baking sheet, cut crossways slits along the top with a sharp knife (this lets bubbles out) and set these into a warm place until they have grown–usually less that the first rise. about half way through this rise (20? 25 minutes?) pre-heat the oven to 450 degrees.

Step 6, Baking: Just before putting them in the oven, I usually spary a light misting of vinegar on the outside of each loaf. This adds to the crunchiness of the crust. You can also add a little pan of water to the bottom of the oven, since the steam will also make the crust crustier. Put the loaves in the oven for 15 minutes, rotate them, putting bread from the lower racks onto the top, turning the backs to the front, etc.until the top crust is a nice dark brown. figure out your oven, and see if you need to turn them or rotate them to get them to cook evenly. When they are done, get them out, take them out of the pans, and put them on a cooling rack.
If everything has gone well, they should smell as golden as all that is right about the material world, and about a minute later you shoulod be able to hear la chanson du pain, the song of the bread, that tinkling little cracking noise as the bread cools.

Last Step, Sharing: This one should be shared quickly. You should share one loaf with baggettes2a warm loved one and some cold butter before it even cools. Another loaf will be perfect with some olive oil and pasta and salads and a rich Chianti for supper. a little loaf will be perfect with some sharp cheddar, a hard boiled egg, a whole tomato, a dill pickle and some branston pickle for a plow-man’s lunch at work. Most importantly, if you have extra bread, you will have to give it away, but–with this bread–quickly. It is perfect with a bottle of wine as a house warming gift or in lieu of a condolence card for seomone who has lost a loved one, or to hang on a door knob for a friend to find when they get home from work, or for the host for the evenings vespers, or to share with a college student or wandering monk.


Corn Cakes

Everybody living in the South should have a good cornbread recipe. I’ve tried & I’ve tried, but I’ve never been completely happy with the results. So, I switched to corn Fish Tacocakes–also called hoe cakes, or other nick-names. My original inspiration was having them at Halls on the River outside of Winchester Kentucky (I can’t believe I split an order of Lamb Fries with a Simpsons staff writer and they never made it into an episode), but Mine get thinner and thinner, and can also be used for my Tequila-Lime Fish & Sriracha Sauce Tacos.

Ingredients:

  • 1/2 cup self-rising corn mealCorn Cakes
  • 1/2 cup white flour
  • 1 tsp sugar
  • 1 egg
  • 1/2 cup buttermilk
  • 1/4 cup water (more for thinner cakes)
  • 1/8 cup coconut oil
  • additional oil or butter for frying

Step 1: sifting: sift together the dry ingredients, the corn meal, the flour and the sugar in a bowl, or, better yet, something you can pour from.

Step 2, mixing: in a large mug or small mason jar (or whatever is handy) mix the wet ingredients, the egg, buttermilk, water, and oil.

Step 3, adding it up: add the wet ingredients to the dry ones and stir them together.

Step 4, frying: on a greased, preheated skillet on medium high heat, cook the corn cakes as you would pancakes: pour the batter out, let it cook until bubbles on top of the batter stay, flip them over and cook the other side.

After getting them out of the frying pan or off the griddle, I usually keep the warm in a Peace_Lentil_SoupPeace Lentils Left Overtoaster oven or “real” oven until I am ready to serve them. They are very good with my Red Lentil Peace Soup, or, for serving at Lenten meals, and all of the usual vital uses–it’s all love.

Vegetarian Cottage Pie

Dear Marissa,
How are you? I am fine, as things go. How was the upper mid-west? I hope your Christmas was great, or, at the very least, not terribly stressful.

Cottage PieOur dear Meg has brought it to my attention that you feel I should pass on the recipe for the cottage pie that I baked on that other great holiday, National Talk Like a Pirate Day. This will be difficult, since most stew-type things are largely improvised, left unrecorded, etc., but I will make an attempt. All measurements are estimates.

Ingredients:

  • 2 cups TVP (texturized vegetable protein)
  • 2 tsp. Onion Powder
  • 2 tsp garlic powder
  • 1 tsp paprika
  • 1 tsp Worcester Sauce
  • 2 tsp soy sauce
  • 1/2 red wine
  • some olive oil
  • 1/2 lb sliced mushrooms
  • 1 small onion, chopped
  • 2 chopped carrots
  • some (to taste, maybe one small) diced potatoes
  • 2 Tbsp imitation beef stock (I have found some really cheap Mexican stuff that doesn’t actually contain beef, but has some good flavor; bullion will work, too)
  • 1/2 cup pearled barley
  • 1/2 red lentils
  • 1/2 cup frozen or fresh peas
  • 1 pastry pie crust or tube of refrigerator biscuits
  • 1/2 cup cheddar cheese (I prefer Dubliner or Cabots, both of which are rennet free)
  • 3 cups or so of mashed potatoes
  • hot water as needed

Step 1, Prep the Protein: (nb: this is my standard imitation ground beef recipe. I also use it in chilli, and, with some sage, as the basis for my biscuits and gravy recipe) Mix the TVP, onion powder, garlic powder, paprika, Worcester sauce, soy sauce and wine. Add enough boiling water to just cover, stir and set aside to lest the TVP absorb the liquid.

Step 2, frying: in a pot, heat a little oil and add the sliced mushrooms and onion. After they are browned, add the protein mixture and stir fry it a bit. Add the chopped carrots and potatoes.

Step 3, stewing: add water (Wode Toad suggests stout or red wine) to cover, along with the fake beef stock, pearled barley and red lentils. Stir and bring to a bubble, then cover and allow this to simmer for 30 minutes or so, while you prepare the pie shell and mashed potatoes.

Step 4, shelling: of course, you don’t need this. The pie is actually OK without any crust, or, of course, you can actually bake a pastry pie shell. What I did was to buy the extremely flaky tube-biscuits, preheat the oven as directed, butter a pie tin or casserole, and then peal the biscuits as thin as I could and cover (line) the tin, putting them in the oven as directed and baking them until browned.

Step 5, mashing potatoes: my great, great grandmother made mashed potatoes for folks starting the Oregon Trail in Western Pennsylvania. It’s what made this country great.

Stout Vegetable PieStep 6, putting it all together: fill the pie tin with the stew, sprinkle with some sharp cheddar, Top with mashed potatoes, broil the top of the potatoes a bit, and there you go.

I hope this will do, and that it finds you well.
If you think of it, remind our mutual friend that she really could return the dish from the last cottage pie I made her.Dr_-Bear looking left

Your friend,
Dr. Bear

Pumpkin Carrot Beet Muffins

PCB muffins 3Like many recipes, this one has a bunch of dry ingredients, and a bunch of wet ingredients which eventually come together.


Ingredients:

  • 2 cups flour (Whole wheat, white, both, as you wish)
  • ¾ cup of sugar
  • 2 tsp baking soda
  • 2 tsp. cinnamon
  • ½ tsp mace (this gives it a little bite, but can be left out or replaced with ginger)
  • ½ tsp salt
  • ½ cup brown sugar (it will clog the sifter).
  • ½ pound shredded carrots (or carrot  & beets mixed) I have a scale, but you can also sort of figure out half of a 1 lb. bag of carrots.
  • ½ cup raisins (Golden raisins are better; sometimes, if the raising are really dry, I soak them in rum or coffee or warm water)
  • ½ cup walnuts
  • (optional, ½ cup pumpkin seeds)
  • 2 cup pumpkin
  • 3 eggs
  • ½ cup oil (it might work without this, I liked making it with coconut oil.)
  • 2 tsp. vanilla

Step 1, Prepare Ye the way: Preheat the oven to 350°, shred or grate the carrots and/or beets, either grease the muffin tins or put in the cupcake liners (I usually spray a little canola oil in the bottom of these to make things come out easier). I get 2 dozen medium sized muffins out of this mix.

Step 2, sifting the dry ingredients: In one bowl crumble up the brown sugar, then sift (mix if you don’t have a sifter) in the flour, white sugar, baking soda, cinnamon, mace, and salt. Mix thoroughly.

Step 3, mixing the wet ingredients: In another bowl, mix the shredded root vegetables, raisins, walnuts, pumpkin, eggs, oil and vanilla.

 Step 4, combining the big mess: Add the dry ingredients to the wet ones and mix well. You want to make sure the individual bits of carrot & beet are each coated to keep them from getting too clumpy. The consistency should be much firmer than batter, but a little more liquid than cookie dough. I used pumpkin from a vegetable my daughter had slaughtered, but canned pumpkin is a but less wet, so you might have to add a little liquid, like 1/4 cup of orange juice.

Step 5, baking: Fill two dozen or so muffin tins. Bake at 350 degrees for 30 minutes. I never wrote the time down, but it is at least 20 minutes and probably less than 35. See how they look. Stick a toothpick in one and see if it comes out battery.

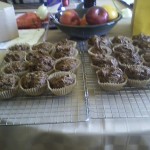
PCB muffins 1Enjoy! These are perfect breakfast, for leaving at the back door of good friends, for sneaking across the counter to gorgeous barristas, for setting on the desks of helpful librarians, for sending to Brooklyn with couch-surfing college girls; you name it.

Gingerbread Chocolate Chip Cake

Gingerbread Chocolate Chip Cake for Valentine’s Day

IGCC1ngredients:

 2 1/2 cups all-purpose flour
1  tsp.  baking powder
1/2 tsp. salt
2 Tbs ground ginger
1 tsp.  ground cinnamon
1/4 tsp. ground pepper. cloves or red pepper (depending on how much adventure you like)
1/4 tsp. nutmeg
1 cup oatmeal stout or Guinness Stout
1 cup dark molasses (not blackstrap)
1/2 tsp. baking soda
1 cup packed dark brown sugar
1 cup granulated sugar
1 Tbsp freshly grated ginger
3 large eggs
1/2 cup vegetable oil
1/2 cup dark chocolate chips
Powdered  sugar for dusting

Step 1, Prepare ye the way: Preheat the oven to 350, grease & flour the pan or pans; I think this makes one Bundt cake, two smaller cakes and two or three loaves.  Also assemble all the ingredients on the counter.

Step 2, sifting the dry ingredients: In a large bowl, sift the flour, baking powder, salt, dry ginger, cinnamon, and pepper or nutmeg. Set aside.

Step 3, mixing the wet ingredients: in a medium saucepan (leave room; there will be foam), heat the stout. Take it off the burner, and carefully (!) add the baking soda (this is like the elementary school volcano experiment, but also like my soft pretzel/laugen recipe), whisking it smooth. After the foaming subsides, whisk in and dissolve the brown and white sugars, then, as it cools,  the ginger, the eggs and the oil.

Step 4, combining:  Add the wet ingredients to the dry ingredients, maybe about a third at a time, mixing thoroughly. You don’t want pockets of dry, floury ingredients.

Step 5, putting it in the pan/pans: Add half the mixture to the prepared pan/pans, sprinkle this with half of the chocolate chips, then pour in the rest of the mixture and sprinkle with (you guessed this, didn’t you) the rest of the chips. They should sink into the batter.

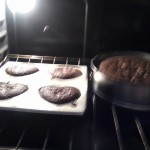
Gingerbread Chocolate Chip Cakes in OvenStep 6, pop it in the oven for baby & me: bake the pans at 350 for 25 to 35 minutes, or until you can stick a toothpick in it and pull it out without it being covered with batter. Take it out, let it sit for a minute or so, then take it from the pan onto a wire rack to cool all the way.GCC5

Step 7, decorating and serving: Once it is cooled, you can dust the whole thing with powdered sugar, or come up with some sort of delicious icing. I plan to powder it, then decorate it with little bits of chocolate.

Peace Lentil Soup

Peace_Lentil_SoupRed Lentil Soup
My daughter Grace acquired this recipe at a potluck after a march to support a Palestinian homeland, so we call it “Peace Lentil Soup;” marching is necessary, because there is so much to be outraged about, but I believe that the basis of peace is eating together. This soup is promising because it is cheap, delicious, and doesn’t involve killing anything. 

Ingredients:

 2 Tbs oil (olive, canola or peanut)
1 onion, chopped (or 1 cup frozen, chopped)
4 garlic cloves, minced
Salt to taste
1/2 tsp ground cumin (more to taste)
1/2 tsp ground coriander (more to taste)
2 tsp curry powder
1 (28-oz) can chopped tomatoes in juice
1 lb red lentils (about 2 cups), washed and picked over
2 qts chicken or vegetable stock (add more liquid if you like a thinner soup)
1/4 tsp ground pepper (more to taste)
Cayenne (optional, to taste)

Step1, Sauté: Heat oil in a large, heavy soup pot over medium heat. Add onion. Cook, stirring, until tender, about 5 minutes.
Add garlic, 1/2 tsp salt, cumin, coriander, curry powder.
Stir together for about a minute until the garlic is fragrant.
Step 2, Stew: Stir in tomatoes with their juice.
Bring to a simmer and cook, stirring often, for 10 minutes, until the tomatoes have cooked down slightly.
Stir in lentils and liquid.
Bring to a boil, reduce heat, cover and simmer 30 minutes.
Step 3, fiddle a little: Add more salt to taste, if desired, and cook 15-30 minutes more until lentils have fallen apart and thickened the soup.
Using the back of your spoon, mash the lentils against the side of the pot to thicken the soup further.
Add the pepper and cayenne to taste.

Step 4, share it with other people around your table.
Hey, Hipsters: you gotta eat. Have some of your friends over and have soup. One of the most sincere (that means not ironic) things you can do is eat with people in your own house. It is really good with water or iced tea, but especially gPeace Lentils Left Overood with a sweet white wine, a crisp pub cider, or a complex local IPA. The last time I made this, I served it with salads and corn cakes with some sharp, hard cheeses, and the next 3 hours of  conversation were so lively, so lovely that I forgot that I had made dessert.
As always, there may be leftovers for monks, students, et.al.

Candied Almonds

Candied Almonds (Gebrannte Mandeln)
Gebrannte_MandelnThe German name of these is “Gebrannte Mandeln,” which literally means “burnt almonds;” they are something street vendors sold, and they have a unique smell which is a combination of carmelized sugar, toasted almonds, cinnamon, vanilla, and just a hint of rosewater. They are one of the “Proustian” memories of my childhood.

Ingredients:

2 cup toasted whole almonds (if they are raw, toast them in the oven at 350 or so for 20 minutes or so)
1 cup sugar
1 cup water
1/2 tsp. cinnamon
dash vanilla
1 Tbl. rose water (really, this is available at many stores, especially ones with a Middle Eastern customer base)

Step 1, the syrup: In a deep pot, on high heat, combine the sugar and the water, stirring, and stirring , and stirring, until it cooks down to a heavy syrup, and starts to turn brown. This will take  along time, and is quite dangerous, since the hot sugar will scald and blister you if it touches your skin.

Step 2, mixing it up: Add in the cinnamon and the vanilla and mix well, then add the almonds and stir until the almonds are all coated, and the sugar syrup begins to chrystalize or solidify just a bit.

Step 3, mixing it up some more: Add the rosewater; this will seem to melt the syrup again, and repeat the mixing process. Continue to stir (it will be stiff) over a high heat as the sugar begins to solidify, and then past that for just a moment, as the sugar begins to melt and carmelize. Quickly, before the sugar begins to burn, pour the whole thing out on a pan and allow it to cool and to dry.

Why eat bad bread?

Basic Wholesome Wheat Bread RecipeWholesome_Wheat_Bread.

 Ingredients: 

3 1/2 cups warm water
2 Tbsp. Honey
2 Tbsp. Yeast (maybe 3 envelopes?)
1Tbsp. Salt
8-9 cups, give or take, of whole wheat (3 cups) and bread flour (6+ cups); Yeah, yeah, I don’t have an exact amount because there isn’t an exact amount–I live in a very humid, even damp, part of the country, if you are actually dry, you will need less flour. Using more whloe wheat will also require less wheat overall. I really, really love King Arthur Flour, and start with 2 cups of King Arthur Whole Wheat, then 2 Cups of King Arthur White Wheat, and then 5 or more cups of King Arthur Bread Flour, but you go with what you have.

Step 1, Proofing: In a large bowl (or the mixer bowl if you plan on letting the bread hook to the heavy lifting); whisk in the 2 Tbsp. of Honey, and the 2 Tbsp. of Yeast; mix until smooth. Whisk in the first 3 cups of flour–I usually move from the coarsest flour to the smoothest, so the wheat flour here. Now leave this in a warm place for 5 minutes and walk away. Fold laundry, try to figure out where you put the bread flour, dance, just leave the yeast alone.
Step 2, Kneading: Come back, Little Sheba. If it is bigger, and a little poofy, the yeast is doing great. If not, either you have bad yeast or a cold spot. Whisk down this living thing in the bowl, and add 1 Tbsp of Salt. Add in the Bread Flour 1/4 of a cup at a time, and thoroughly mix it in; when the whisk becomes impractical, use a big wooden spoon, when this is too hard, use a mixer with a bread hook or turn it our onto a floured surface. It is important to knead the flour in 1/4 of a cup at a time, and after each bit of flour, hook or knead the bread until it becomes one thing again–not a mixture of flour and dough, but one unit. When the dough is a single round thing holding on to itself and not sticking to other things, behaving about like a deflated volley ball, it is ready. The amount of the flour doesn’t matter–getting it to this proper consistency is what matters. Roll it around on the counter for good measure.
Step 3, Rising: Grease a smooth bowl 3 times as big as the dough. Roll the dough ball in the oil, and then cover with plastic wrap or a wet towel or something that will let it slip without drying out. Let this sit in in a warm place–in the oven with a heating pad on a different shelf, on the sunny side of the house, just a safe and warm place–until the dough has doubled in size. Usually, this will be about an hour.
Step 4, Second Rising: Grease 3 bread pans, or 2 bread pans and 2 little pans, or some such combinations. Turn the dough out onto a clean surface, and punch it down (forcefully knead it), which should reduce it to close to its original size. Separate this into 3 portions ( or 4 or… you figure it out) and shape these into loaves; make sure that there are not seams or spots the loaf might separate, maybe pinching loose edges and rolling it about a bit–each should be smooth and coherent–it’s own little self. Put each loaf into a pan, slit along the top with a sharp knife (this lets bubbles out) and set these into a warm place until they have grown–usually less that the first rise. about half way through this rise (20? 25 minutes?) pre-heat the oven to 400 degrees.
Step 5, Baking: put them in the oven for 30 or 35 minutes, until the top crust is a nice dark brown. figure out your oven, and see if you need to turn them or rotate them to get them to cook evenly. When they are done, get them out, take them out of the pans, and put them on a cooling rack. Usually, at this point, I take a little butter and polish the top with them, but one doesn’t have to.

The Philosopher's lockerLast Step, Sharing: You may have noticed I made 3 loaves. You can, of course, use division and figure out how to make a smaller batch, but I suggest you make 3, and then figure out why you needed 3. The bread might be so good that one loaf is eaten before it even cools. Most importantly, if you have extra bread, you will have to give it away. Give it to a wandering Buddhist monk, a musician or a college student–all of these are good karma. You might give some to somebody you love, or whom you wish to love, or who needs to feel loved. My mom says it is just as easy to pray for somebody while kneading bread as it is just to pray for somebody; I don’t understand prayer, but I know everybody needs to feel loved and everybody loves good bread.

Note: this recipe is adapted from Family Fun’s Family Cookbook. I know, it’s Disney, but it is a great cookbook.