Recipe for Sensuality

Ingredients:

  • 1 Cucumber
  • 1 Tomato
  • 1 Carrot
  • Mixed Salad Greens
  • Salt to taste

Step 1: Have a seat; you are going to be here for a while. The two main ingredients will be time and attention; the main tools you already have with you: your senses.
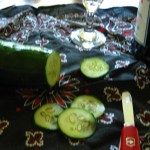
IMG_2984Step 2: Find a good, preferable fresh and local, but really good cucumber. Cut a thin slice or two off it. Hold it up to the light—already the juice from the cucumber will be forming in little drops on the outside. Place it on you tongue, and try to think about the flavor. Breathe through both your nose and your mouth, so you can get the full smell. The flavor of a cucumber is subtle, but unmistakable. Slowly chew it, letting it melt into your mouth. Try nibbling the next one from the outside in—how is the surface, then each layer, different in taste? Try a thicker slice; doesn’t it taste differently? How about if you just take a big bit out of the unsliced cucumber? If you add just a little bit of salt—just a little bit!—how does that change it? If you don’t over-power it, the salt might enhance the flavor.
Pause.
Slowly finish the cucumber.

Step 3: Take a sip of ice cold Prosecco DOC.

Step 4: Find a fresh tomato, preferably still warm from the sun. TomatoSmell it—the stem and leaves of a tomato have a sharp, harsh scent, and if the tomato is fresh you can still smell them, as if you were standing in the patch (you could, of course, be standing in the patch—that would be even better, unless it is your neighbor’s, in which case, please keep your eyes open).

Feel the weight of it in your hand, the firmness of the skin as you roll it in your palm. Feel its skin against your cheek, then your lips. Feel the elasticity of the skin against your teeth, and then the sudden give of puncture and bite. Suck in the juice & seeds, feeling them against the back of your throat, swallow and then laugh.
Pause.
Continue as needed.

Step 5: How about another sip of wine? Maybe you should get a napkin to clean up.

Step 6: Find a fresh carrot, and scrub it thoroughly. Take a big bite of it, and chew it IMG_3002thoughtfully. Is it sweet? Is it bitter? Chew it slowly, breathing, again, through both your mouth and nose, to let the air flow across it.

Try slicing it thickly. It tastes differently, doesn’t it? Eat it slowly, nibbling from the outside in, and savoring each part.
Try shaving it with a vegetable peeler, and eating the long peelings. Again, it tastes differently this way—more sweet, but also more insubstantial and faint.

Step 7: Eat the salad greens one by one, pausing before going on to the next leaf. IMG_3003The solid reliability of leaf lettuce, the peppery-ness of arugula, the firm, thick green taste of lettuce—each is different. Try just a hint of salt. Does this enhance, or just mask the flavor?

Crockpot Apple Butter and/or Sauce

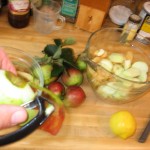
The Virginia Winesaps in my back yard are so full that the branchesApple Harvest are bending over. It’s time to harvest. The apples tend to be very firm, a bit grainy, and quite tart, and aren’t incredibly good for eating, but are great for pies and for apple sauce and apple butter.

Ingredients:

  • 6 cups of peeled and sliced apples
  • ½ cup sugar
  • 1 Tbsp cinnamon
  • 1 lemon

Apple Sauce 002 best  Step 1, the tedious part: Harvest (or buy) several pounds of apples. Find a comfortable place to sit or stand, and peel them, and then slice them into a bowl until you have 8 cups or a little more.

Step 2, mixing it up: Put the apples in a large crock-pot. Add the sugar (more if you like it sweeter, or if the apples are really sour, but I find this is enough), the cinnamon (again, to taste), and the juice of the lemon. If you want to be creative, you might consider adding a tablespoon of ginger, or a half cup of rum, or some cardamom; red-hots if you are that kind.  Mix thoroughly.

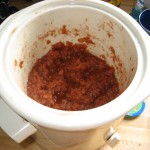
Step 3, cook it down: Turn it on to a medium heat, and let it sit for 6 hours if you want Apple Sauce 004apple sauce, 8 or more if you want apple butter. You will know when it is the thickness that you want. I cooked it down to about 3 cups, which makes it more like a spread.

Step 4, share and enjoy: They are great on toast, or with a scone, or on a sandwich with peanut-butter, or to sweeten tea, or in a Vinaigrette. You can store them in the fridge in cute little jars, or give them to friends. You can take it and some warm baked bread to a class you are teaching, or leave some in the break-room at work.

Wheaten Bread (Irish Brown Bread)

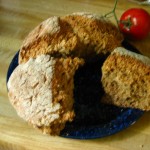
Irish Wheaten Bread 007On our first day in Ireland, for our very first meal in Europe, we had breakfast at the Railway Hotel. Besides some marvelous tea and incredible service, we also had some toast, which included a brown bread.
My foodie daughter was in love.
“Wouldn’t it be ironic,” she asked, “if after going through Germany and France, my favorite bread ended up being Irish Brown Bread, and my favorite cheese really was a sharp Irish Cheddar?”

Ne Gustibus Disputatem Est.

Ingredients:

  • 3 cups extra-course whole wheat flour
  • ½ cup bread flour
  • 1 tsp baking powder
  • 1 tsp baking soda
  • 1 tsp salt
  • 1 cup oat bran
  • 1 cup wheat germ
  • ¼ cup brewer’s yeast (optional)
  • ¼ cup melted butter
  • 2 cups buttermilk or milk
  • 1 Tbsp dark corn syrup or honey
  • 1 egg

Step 1, Prepare Ye the way: Preheat the oven to 400°, assemble all the ingredients, run to the store because you are out of butter, and grease & flour a baking sheet or cake pan.

Step 2, sifting the dry ingredients: In one bowl sift (mix if you don’t have a sifter) the flours, baking powder, baking soda, and salt. Add in the oat bran, wheat germ, and brewer’s yeast.  Mix thoroughly.

Step 3, pastry cutting: Mix in the butter, much as you would cut in cold butter or shortening.

Step 4, mixing the wet ingredients: In another bowl, beat the egg, then mix in the buttermilk and the corn syrup.

Step 4, combining the big mess: Add the wet ingredients to the dry ones and mix well. The results might be a bit gloppy. No, I take that back: they result will be very gloppy. Flour your hands and try to fashion this into a ball, and if you cannot, add a bit more flour until this is manageable.

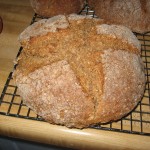
Step 5, baking: Set the round loaf (or round loaves, if you are making little ones)Irish Wheaten Bread 001 onto the pan. Score the top with a cross. Bake at 400 degrees for 30 minutes. Rotate them to make sure they brown evenly, reduce the oven temperature to 375, and bake for 30 minutes more. The result should be a crumbly brown loaf.

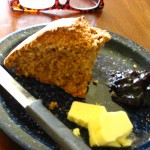
Final Step, share and enjoy They break along the score, so you can each munch a quarter. You can have them with a mug of strong Irish tea, and some cold butter, and some current jam. They are perfect as a toast for breakfast, or to accompany a hearty plowman’s lunch.
Irish Wheaten Bread 010As always, they are perfect for giving to somebody you love.

Chocolate Macaroon Cookies

Chocolate Macaroon Cookies 010Now, I know it is lovely to have a rich, dark chocolate cookie with some cold milk.


…and, in the same way, it is lovely to have a coconutChocolate Macaroon Cookies 019 macaroon with a cup of tea.


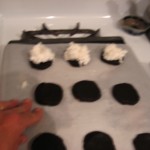
So, why not the best of both worlds? Why not have a coconut macaroon on top of a chocolate cookie?Chocolate Macaroon Cookies 017


Of course, we could take this to its natural

Chocolate Macaroon Cookies 007

conclusion, wrap the warm cookies around a broken pretzel, cover it with red food coloring, leave it in a pool of red jam, and tell small children you have chopped off Elmo’s fingers.

Chocolate Macaroon Cookies 014

Chocolate Macaroon Cookies 016Chocolate Macaroon Cookies 002

Chocolate Macaroon Cookies 024


Chocolate Macaroon Cookies 003


Savory Sides

Hi, Folks; I’m back.

Excited about the food, but still wish I was on the road.

Chutney & PiccalliI have not made it back into the laboratory for a new recipe yet (although I have great ideas to try), but I wanted to say a word about Chutneys.

That word is “wow.”

Chutneys come into our food world from the Indian subcontinent, and were adapted and adopted by the British. British food has traditionally been rather bland, but Plum Chutneythey have a fine appreciation for condiments of every kind, and borrowed heavily from this spicier tradition when they occupied India as a colony. Chutney can be a variety of things, but is generally made of fruits, vinegar, sugar, salt, and spices that are boiled down to a thick sauce–about the consistency of jam. The combination of the pungent tartness of the vinegar with the sweetness and the flavor of the fruit, along with the saltiness and the spices is amazing, and allows for an infinite number of possible combinations.
Edinburgh 1It is great to accompany simple things like a ploughman’s lunch or eggs, but can be served on the side of just about anything. I had an amazing sandwich picked up at a Spencer & Marks store of a caramelized onion, wensleydale cheese & chutney.  A somewhat similar thing would be certain British forms of pickle–like Branston Pickle or Piccalilli. They can be used for many of the things we would use salsa.

I had sort of been preparing for chutney thanks to my friends from “Eat Local Or Die!” at beet bruschetta 2the Johnson City Farmer’s Market, who make some incredible savory jams, or which my favorites are the Caramelized Onion Jam and the Caramelized Onion and Ghost Pepper Jam. I made a really interesting bruschetta by stacking a slice of raw beet, a slice of sheep ricotta salata, a dollop of Ghost Pepper Jam and some roasted salted pecans on a piece of French bread toast.

Anyway, instead of a recipe, I will encourage you to go out and experiment on your Edinburgh 2own, either boiling down that fresh fruit you have with some vinegar and making your own chutney, or by finding some and seeing what you can come up with.

Enjoy.
Share.
Love.

Apple Chai Muffins

Chai MuffinsSo, a friend of mine who loves muffins was coming to town, and so we decided we should whip up some of the Bistro’s wonderful muffins. However, then she commented on not liking the “weird” stuff we do, like beets and rhubarb (I suppose Srirachi is right out). So, we came up with this rather normal muffin recipe.


Ingredients:

  • 2 cups flour (Whole wheat, white, both, as you wish)
  • ½ cup of sugar
  • 2 tsp baking soda
  • ½ tsp salt
  • ½ cup brown sugar
  • ½ tsp cardamom
  • ½ tsp cinnamon
  • ½ tsp ginger
  • ¼ tsp cloves
  • ¼ tsp nutmeg
  • 1 cup diced apples
  • ½ cup chopped golden raisins
  • ½ cup rolled oats
  • ½ cup walnuts
  • 2 cup cooked sweet potato (I like it baked, but I assume      canned will do)
  • 3 eggs
  • ½ cup buttermilk or Greek yoghurt
  • ½ cup oil (it might work without this; I liked making it      with coconut oil.)
  • 2 tsp. vanilla
  • ½ cup brewer’s yeast (optional)

Step 1, Prepare Ye the way: Preheat the oven to 350°, chop the apple, either grease the muffin tins or put in the cupcake liners (I usually spray a little canola oil in the bottom of these to make things come out easier). I get 2 dozen medium sized muffins out of this mix.

Step 2, sifting the dry ingredients: In one bowl crumble up the brown sugar, then sift (mix if you don’t have a sifter) in the flour, white sugar, baking soda, brewers yeast, and salt. Mix thoroughly.

Step 3, mixing the wet ingredients: In another bowl, mix the apples, sweet potato, spices, vanilla, oatmeal, and walnuts,.

Step 4, combining the big mess: Add the dry ingredients to the wet ones and mix well. You want to make sure the individual bits of apple are each coated to keep them from getting too clumpy. Now mix in the eggs, buttermilk, and oil. The consistency should be much firmer than batter, but a little more liquid than cookie dough.

Step 5, baking: Fill two dozen or so muffin tins. Bake at 350 degrees for 30 minutes. See how they look. Stick a toothpick in one and see if it comes out battery.

PCB muffins 3Step 6, sharing: As always, these are great for breakfast, but especially great to share with a friend or loved one. Invite somebody over for Tea or an Herbal Infusions or some sort (maybe even for Chai). Better yet, brag about them and see if you can get somebody to invite you over for tea just to see how good they are.

Shoo Fly Scones

My daughter resently challenged me to invent a Shoo-Fly Scone. My favorite food is Shoo-Fly Pie. I don’t tend to be the person to deal in superlatives or easily make lists, but this one is undoubtedly my favorite.
Shoo Fly Scone 4 The pie was developed by the Pennsylvania Dutch, a vague term used for the German Anabaptist dissenters (like the Amish or Mennonites, as distinct from the Moravians) who settled in Pennsylvania in the 19th Century. I imagine that in late winter, after most of the previous summer’s fruit was gone, some farm wife somewhere decided to make a pie out of molasses. The result is wonderful–wet & gooey on the bottom, like a light spice cake in the middle, and posdery and sweet on the top. It is so sweet & sticky that it attracts flies (which is how it gets its name).
This adapts the flavor as a scone, which seems appropriate, since I consider Shoo-Fly to be the ideal tea or breakfast food.
An interesting side note: apparently, pronouncing scone as rhyming with cone as in the Coen brothers rather than con as in consanguinity will earn you a long rant from Wode Toad. If you walk in during the rant and mispronounce it, he will throw things. How is your head, Brandon?

Ingredients:

  • 2 ½ cups flour (Whole wheat, white, both, as you wish)
  • ¼ cup of sugar
  • 1 tsp baking powder
  • ½ tsp baking soda
  • ½ tsp salt
  • 1 tsp cinnamon
  • 3 Tbsp cold butter
  • ¾ cup plain yoghurt
  • ½ cup molasses (or dark corn syrup, or a mixture)
  • 1 egg

Step 1, Prepare Ye the way: Preheat the oven to 400°, assemble all the ingredients, run to the store because you are out of molasses, and grease a baking sheet.

Step 2, sifting the dry ingredients: In one bowl sift (mix if you don’t have a sifter) the flour, sugar, baking posder, baking soda, cinnamon, and salt. Mix thoroughly.

Step 3, pastry cutting: Cut in the ice cold sliced butter, using either a pastry cutter or a knife. I suppose some processer thingy can do this, too, but I don’t own one. The result should be crumbly. Take out a quarter cup of this, mix it with a sprinkle of sugar, and set it aside for the crumble topping.

Step 4, mixing the wet ingredients: In another bowl, mix the yoghurt, the molasses and the egg.

Step 4, combining the big mess: Add the wet ingredients to the dry ones and mix well. THe results might be a bit gloppy. Try not to overwork the dough.The consistency will be much firmer than batter, but a little more liquid than cookie dough, a little drier than raw muffin.

Step 5, baking: Flouring your hands, form little scone sized patties out of the dough and put them on the greased. Bake at 400 degrees for 15 minutes. See how they look. Stick a toothpick in one and see if it comes out battery.


Final Step, share and enjoy They do make a handy breakfast, which is much easier to eat in the car than the pie. To your left, they are pictured with my Rhubarb-Almond Scones. They are perfect for sharing over breakfast, or in the afternoon over tea, or for dropping by and giving to friends.

Ramp Ravioli with Cashew Ricotta filling

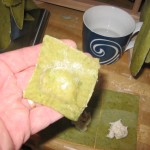
IMG_2040[1]This is my Übermahl or Over-Meal, a process of self-transcendence that eschews traditional cooking and makes its home beyond the pale. It is also delicious.

Ramps, for those of you who do not live in the Appalachian Mountains, are a variety of wild Leek than can be found in this region in the spring. It has a unique flavor, but is milder than onions or garlic..

Part One: The Filling
Homemade Ravioli Cashew Ricotta Cheese

(lifted from the Simple Veganista http://thesimpleveganista.blogspot.com/2012/10/cashew-ricotta-cheese.html )
Ingredients
  • 1½ cup raw cashews
  • water
  • 1 large lemon (or, in a pinch, 1 Tbsp vinegar
  • 1 Tbsp nutritional yeast (optional)
  • 1 clove garlic
  • dash onion powder
  • 1 tsp basil (optional)
  • salt & pepper
Step 1, Early Prep (day before, first thing in the morning, etc.): Put the cashews in a bowl and cover them with water, an inch or more above the cashews which will expand. Soak for at least two hours.
Step 2, Blend: Drain the cashews, keeping the water. Add the cashews and all the other ingredients in a blender or food processor, blend scraping down sides as needed until creamy. You might add a little of the water if it isn’t wet enough. Taste it and see if you want to monkey with it until you like the flavor. You might want it saltier, or not. For this recipe, I added 1 tsp of dried basil.
Step 3, let it sit: pour out the mixture into a container that can be covered. Put it in the refrigerator for an hour or two to let it set (in a pinch, this step can be skipped).
Makes appx. 2 cups. Stores in refrigerator for up to a week.
Part Two: The Pasta
Homemade Pasta (4 servings)
Ingredients
  • 2 cups flour
  •  pinch salt
  • 3 eggs (at room temperature)
  • 1 Tbsp olive oil
  • Ramps or other Special Ingredient: if you want to mix it up, add ½ cup of something interesting. For this recipe, I added blanched ramps, but I could have added beets or something else crazy.
Step 1, Sifting: Measure out the dry ingredients (flour & salt) into a sifter. Sift (I’ll bet you didn’t see that coming). You can do this the tradigional way, onto a clean surface, or the easy way, into a large bowl.
Step 2, mixing: Make a deep well in the flour. Break the eggs into this hole and add olive oil. Whisk eggs very gently with a fork, gradually incorporating flour from the sides of the well.
Step 2, alternate: in a food processor or blender, add your “Special Ingredient,” and chop it to a fine paste. Add the eggs and oil and blend. Put this mixture in the well in the flour.
IMG_2036[1]Step 3, People, people who knead pasta: When mixture becomes too thick to mix with a fork, begin kneading with your hands or your bread hook. Knead dough for 8 to 12 minutes, adding flour as it will take it—the final bit by hand even if you are using a machine. The dough will be harder than bread dough, and smooth and flexible.

Step 4, let it sit: Wrap dough tightly in plastic and allow it to rest at room temperature for 30 minutes.
Step 5, Roll on: Roll out the dough with a pasta machine or a rolling pin to your desired thickness. For the ravioli, I rolled it to about a millimeter. For long Pasta, I prefer it pretty thin. Cut into your favorite style of noodle or stuff with your favorite filling to make ravioli.
Step 5, alternate: Roll out the pasta into long sheets and place half of this Ramp Ravioli 3on a large, smooth surface. Put dollops of the ricotta mixture ad even intervals (do you like big raviolis or small ones?), and moisten the areas in between (to make the pasta stick). Cover the sheet with the other sheets and use gentle pressure to seal the little packets (or a ravioli roller, a cool but difficult tool). Cut in between the dollops—there is a crimper/cutter they make for this, but I use a knife. Press the edges of the packets with a fork to make sure they are sealed.
Step 6, cooking: Bring water to a boil in a large pot and add salt. Cook the pasta until al dente, 1 to 8 minutes depending on thickness. Drain, treat, and eat.

Ramp Ravioli 4Extra Step, treating: You could just make some sauce, but for this, I prepared Browned Butter & Mushrooms. In a large skillet, sizzle a half stick of butter until it begins to brown. Add a half to a whole pound of sliced mushrroms, and allow them to brown as well. If too much of the liquide boils away, add more butter or a little white wine. Add some mixed garlic for the last little bit, long enough so it softens & releases its flavor, but not long enough to brown. Dump the pasta into this.

Pita Bread

pita 4This recipe is adapted from a pita bread recipe my friend John—an excellent baker—got from Cooking Light. There are certain tricks—either oven or stove top, spritzing the breads with water to make them puff into pockets—which you can experiment with.


Ingredients:

  • 1 Tbsp. honey
  • 1 Tbsp. yeast
  • 1 cup warm water
  • 2 cups (maybe less?) bread flour
  • 1 cup white whole-wheat flour
  • 2 tbsp. Greek-style yogurt (such as Fage)
  • 1 Tbsp. extra-virgin olive oil
  • 3/4 tsp. salt

Step 1, I demand proof!:  In a large mixing bowl (or the bowl for your mixer), whisk the honey and the yeast in 1 cup of warm water; let it stand 5 minutes to make sure it bubbles.

Step 2, yeast at work: Add in the wheat flour and let the mixture rest and rise for 10 minutes.

Step 3, mix & knead:  Add in the yoghurt, olive oil, and salt. Gradually add in the remaining bread flour, switching to kneading or the bread hook as it becomes stiff.

Step 4, walk away again: Coat it with olive oil, put it in a big bread bowl, cover it, and leave it alone to rise until it is doubled, probably about an hour.

Step 5, short division: Divide the dough into 8 portions. Roll each portion into a 6 inch or so circle.

Step 6, choosing: At this point, you have two choices: baking the flat breads, or cooking them on the stovetop. My preference is to do four of each; the griddle ones are better fresh, the oven ones are better the next day, and it takes too long to do either alone.

Step 7a, baking: Preheat the oven to 500°, and position the oven rack on the lowest shelf. Grease a baking sheet heavily either by hand or with spray. Bake the rounds, one sheet at a time,  for about 8 minutes or until puffed and browned.

Step 7b, griddling: Heat a large griddle, like an iron pan; grease it lightly.pita 2 Place each round on the pan, flip after a few minutes before it begins to scorch. If you sprinkle a little water on the rounds, they will be more poufy, if you prefer them as flat bread, roll them thinner.


Step 8, wrapping up: Cool on a wire rack. pita 1Serve as part of a Mediterranean meal, or with the White-Bean Dip, or with Hummus, or for sandwiches.  Just do your best not to eat alone.

French Lentil Soup

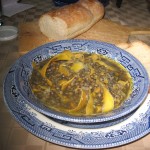
IMG_2021

I realized that I had not done a proper entree for a while.
I am also coming to realize that the bit of philosophy at the end of my recipes might be the best I produce all week.


Ingredients:

  • 1 lb green french lentils (about 2 cups), washed and picked over
  • 2 qts vegetable stock (add more liquid if you like a thinner soup)
  • 1 or 2 bay leaves
  • 2 Tbs olive oil (olive, canola or peanut)
  • 1 onion, finely minced
  • 2 carrots, finely minced
  • 2 stalks celery, finely minced
  • 2 garlic cloves, minced
  • 1 medium peeled raw sweet potato, chopped or shaved into large bits (it cooks really well if you shave it with a vegetable peeler, but this is time consuming.
  • 1 Tbsp. either fines herbs or Herbes de Provence.
  • Salt to taste

Step1, Low Boil: Put the lentils, stock and bay leaves in a large pot. First, bring it to a boil, then reduce the heat to a low simmer and cover the pot. Let this simmer for an hour or more, like bitter resentment.

Step 2, Low Sauté: We are making a Mirepoix here mirepoix(I like mirepoix; mirepoix are cool). Heat the olive oil in a large, heavy soup pot (or pan if you don’t own two pots) over medium heat. Add onion, carrots, and celery. Stir the mixture until it begins to cook, then turn it to low and let it slowly cook for an hour or so. About 20 minutes before the lentils are ready (or you are), add the sweet potato; about 10 minutes before they are ready, add the garlic.

Step 3, mix it up: Add the lentils to the mirepoix (unless you used a pan, then add the mirepoix to the lentils). This is a good time to fish out the bay leaves.

Step 4, fiddle a little: Add the herbs and more salt to taste, if desired, and cook 15-30 minutes more. Add more things or other things until it seems right.

Step 5, share it with other people around your table: Add some freshly baked bread, maybe some salads, some good cheese, and share it. As always, there may be leftovers for monks, students, et.al.

IMG_2025Is this the basis of community? No, not really. It’s not a bad place to start, but this is hospitality. Friendship is when others bring cheese (or wine). Community would involve helping with the fine mincing, or washing & drying the dishes together.